GKC Infotech Institute

“Keep your face always toward the sunshine—and shadows will fall behind you.”

GKC Infotech Institute

“Extraordinary things are always hiding in places people never think to look.”

GKC Infotech Institute

“Setting goals is the first step in turning the invisible into the visible.”

GKC Infotech Institute

“You can have it all. Just not all at once.”

GKC Infotech Institute

“Say something positive, and you’ll see something positive.”

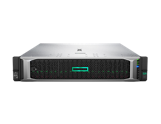
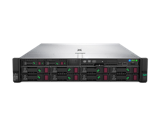
HPE ProLiant DL380 Gen10 server

 Where is your server bottlenecked...storage, compute, expansion?

The HPE ProLiant DL380 Gen10 server delivers the latest in security, performance and expandability, backed by a comprehensive warranty. Standardize on the industry's most trusted compute platform. The HPE ProLiant DL380 Gen10 server is securely designed to reduce costs and complexity, featuring the First and Second Generation Intel® Xeon® Processor Scalable Family with up to a 60% performance gain1 and 27% increase in cores2, plus the HPE 2933 MT/s DDR4 SmartMemory supporting 3.0 TB. It supports 12 Gb/s SAS, and up to 20 NVMe drive plus a broad range of compute options. HPE Persistent Memory offers unprecedented levels of performance for databases and analytic workloads. Run everything from the most basic to mission-critical applications and deploy with confidence. 

HPE ProLiant DL380 Gen10- Center facing                                                                                      HPE ProLiant DL380 Gen10- Hero

Windows Server Shortcut Commands

 Shortcut commands and keys always help to work on a system in a professional manner. Sometimes it may be irritating to navigate through a long path to access a service, program, or tool. In this post, we have listed the most common shortcut commands to manage a Windows system. Following are some of the most common Shortcut Commands to manage a Windows system especially a Windows Server such as Windows Server 2012/2016. We recommend to trying to execute each of them. If you get stuck anywhere, please drop your queries in the comment box.


  1. AdRmsAdmin.msc : To open the Active Directory Rights Management Services console.
  2. Dsac.msc : To open the Active Directory Administration Center console.
  3. Domain.msc : To open the Active Directory Domains and Trust console.
  4. Dsa.msc : To open the Active Directory Users and Computers console.
  5. Dssite.msc : To open the Active Directory Site and Services console.
  6. Certsrv.msc : To pen the Active Directory Certificate Services console.
  7. Dfsmgmt.msc : To open the DFS Management console.
  8. Dhcpmgmt.msc : To open the DHCP Management console.
  9. Diskmgmt.msc : To open the Disk Management console.
  10. Dnsmgmt.msc : To open the DNS Management console.
  11. Compmgmt.msc : To open the Computer Management console.
  12. Devmgmt.msc : To open the Device Manager console.
  13. Nfsmgmt.msc : To open the Services for Network File System management console.
  14. Printmanagement.msc : To open the Print Management console.
  15. Fsmgmt.msc : To open the Shared Folders console.
  16. Virtmgmt.msc : To open the Hyper-V Manager console.
  17. Wdsmgmt.msc : To open the Windows Deployment Services console.
  18. Eventvwr.msc : To open the Event Viewer console.
  19. Gpmc.msc : To open the Group Policy Management console.
  20. Gpme.msc : To open the Group Policy Management Editor console.
  21. Rsop.msc : To open the Resultant Set of Policy console.
  22. Gpedit.msc : To open the Local Group Policy Editor console.
  23. Secpol.msc: To open the Local Security Policy management console.
  24. Certmgr.msc : To open the Certificates Manager console.
  25. Fsrm.msc : To open the File Server Resource Manager console.
  26. Lusrmgr.msc : To open the Local Users and Groups management console.
  27. Perfmon.msc : To open the Performance Monitor console.
  28. Services.msc : To open the Services console.
  29. Taskschd.msc : To open the Task Scheduler tool.
  30. Tpm.msc: To open the TPM Management console.
  31. Wbadmin.msc: To open the Windows Server Backup console.
  32. Cleanmgr.msc: To open the Disk Cleanup utility.
  33. Wf.msc : To open the Windows Firewall and Advanced Security console.
  34. Msinfo32 : To open the System Information window.
  35. Msconfig : To open the System Configuration window.
  36. Iscsicpl : To open the iSCSI Initiator console.
  37. ServerManager : To open the Server Manager console.
  38. Systeminfo : To view the System Information.
  39. Sysdm.cpl : To open the System Properties dialog box.
  40. Ncpa.cpl : To open the Network Connections window.
  41. Inetcpl.cpl : To open Internet Explorer Properties options.

Windows operating systems are not case sensitive like the Linux and Unix system. Hence, executing commands in capital letters or small letter will not affect the result.

Hope this post helped you and you enjoyed it. Do share the article. You may also provide suggestions to add any other commands that you think we have missed.
 

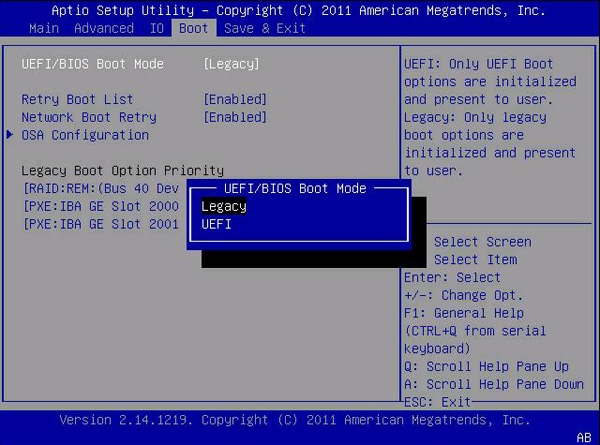
Select UEFI Boot Mode or Legacy BIOS Boot Mode (BIOS)


  1. Access the BIOS Setup Utility.
    1. Boot the system.

      Boot messages scroll across the console screen.

    2. Press the F2 key (or Ctrl +E from a serial terminal) continuously.

      The BIOS Setup Utility main screen appears.

  2. From the BIOS Main menu screen, select Boot.
  3. From the Boot screen, select UEFI/BIOS Boot Mode, and press Enter.

    The UEFI/BIOS Boot Mode dialog box appears.


    Note -  You cannot configure the boot order list after switching the boot mode. A system reboot is required to properly populate the boot order list with devices that support the chosen boot mode.

    image:BIOS screen showing selection of UEFI Boot Mode and Legacy BIOS                                 Boot Mode.
  4. Use the up and down arrows to select Legacy BIOS Boot Mode or UEFI Boot Mode, and then press Enter.
  5. To save the changes and exit the screen, press F10.

See Also

  • Legacy BIOS Boot Mode and UEFI Boot Mode

  • For BIOS screen details, see your server service manual.

Understanding Resistors and Temperature

 A resistor's Temperature Coefficient of Resistance (TCR) tells how much its value changes as its temperature changes. It is usually expressed in ppm/°C (parts per million per degree Centigrade) units. What does that really mean?

Let's use an example: 50 ohm 100 Series precision resistor has a (standard) TCR of 20ppm/°C. That means its resistance will not change more than 0.000020 ohms (20.1,000,000) per ohm per degree Centigrade temperature change (within the rated temperature range of -55 to +145°C, measured from 25°C room temperature.)

Assume our resistor is in a product that heats up from room temperature to 50°C. To find our 50W resistor's (maximum) change caused by that 25°C rise, multiply 0.000020 times 50 (the resistor value) times 25 (the temperature change.) The resistor's value would change no more than 0.025 ohms. (0.000020 X 50 X 25 = 0.025W.)

The actual change may be much smaller, depending on the specific characteristics of that resistor. If you must guarantee a smaller resistance change in your application,  can provide a nonstandard TCR as low as 1 ppm/°C.

Enable or Disable Administrator Account On Login Screen in Windows 10

When you are on the login or welcome screen, the Administrator account is not an option by default in Microsoft Windows 10. You can enable this feature with the following steps.

Method 1 – Via Command

  1. Select “Start” and type “CMD“.
  2. Right-click “Command Prompt” then choose “Run as administrator“.
  3. If prompted, enter a username and password that grants admin rights to the computer.
  4. Type: net user administrator /active:yes
  5. Press “Enter“.
Replace “yes” with “no” to disable the admin account on the welcome screen.

Method 2 – From Admin Tools

  1. Hold the Windows Key while pressing “R” to bring up the Windows Run dialog box.
  2. Type “lusrmgr.msc“, then press “Enter“.
  3. Open “Users“.
  4. Select “Administrator“.
  5. Uncheck or check “Account is disabled” as desired.
  6. Select “OK“.

Method 3 – From Registry

  1. Hold the Windows Key while pressing “R” to bring up the Windows Run dialog box.
  2. Type “regedit“, then press “Enter“.
  3. Navigate to the following:
    • HKEY_LOCAL_MACHINE
    • SOFTWARE
    • Microsoft
    • Windows NT
    • CurrentVersion
    • Winlogon
    • SpecialAccounts
    • UserList
  4. On the right side, right-click on “UserList” and select “New” > “DWORD Value“.
  5. Give the value a name of “Administrator“. Press the “Enter” key when you are done.
  6. Close the Registry Editor and restart the computer.
Delete the “Administrator” value to turn it off and prevent it from appearing on the Welcome screen.

Method 4 – Group Policy

Note: This will not work in Home editions of Windows 10.
  1. Hold the Windows Key while pressing “R” to bring up the Windows Run dialog box.
  2. Type “gpedit.msc“, then press “Enter“.
  3. Navigate to the following:
    • Local Computer Configuration
    • Windows Settings
    • Security Settings
    • Local Policies
    • Security Options
    • Accounts: Administrator Account Status
  4. Enable or Disable the setting as desired.